AWS Free Tier
Types of offers
- Always free: These free tier offers do not expire and are available to all AWS customers
- 12 months free: Enjoy these offers for 12-months following your initial sign-up date to AWS
- Trials: Short-term free trial offers start from the date you activate a particular service
To create a free virtual private server (VPS) on Amazon Web Services, follow the steps belowL
- Create an AWS account
- Go to the AWS Free Tier web page
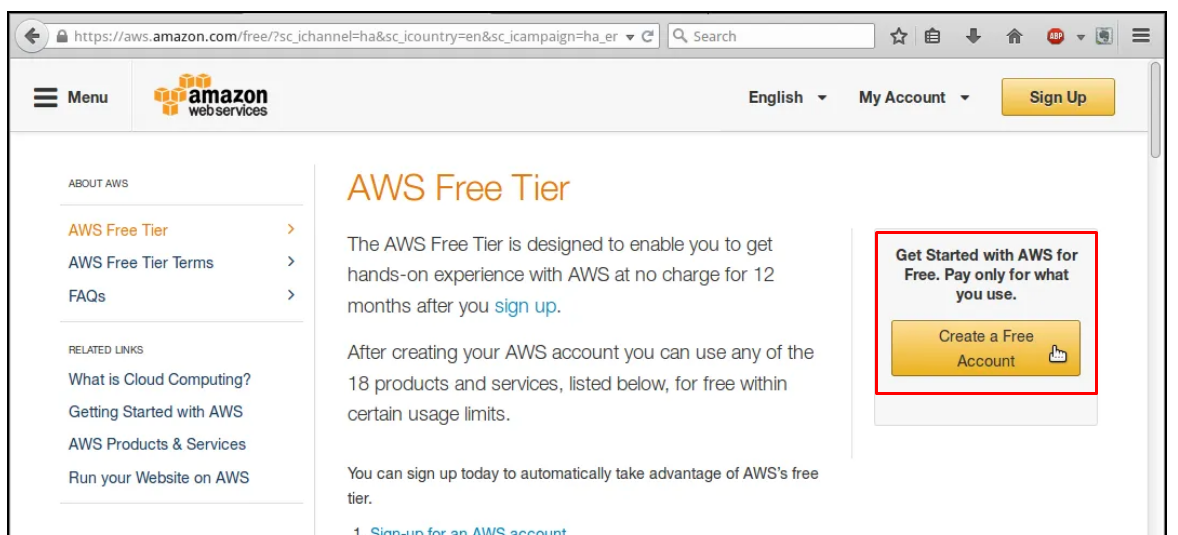
- Click on “Sign up for AWS Account”
- Then, click on “Create a free Account”
- Go to the AWS Free Tier web page
- Create a free instance
- Log into the AWS Console web page
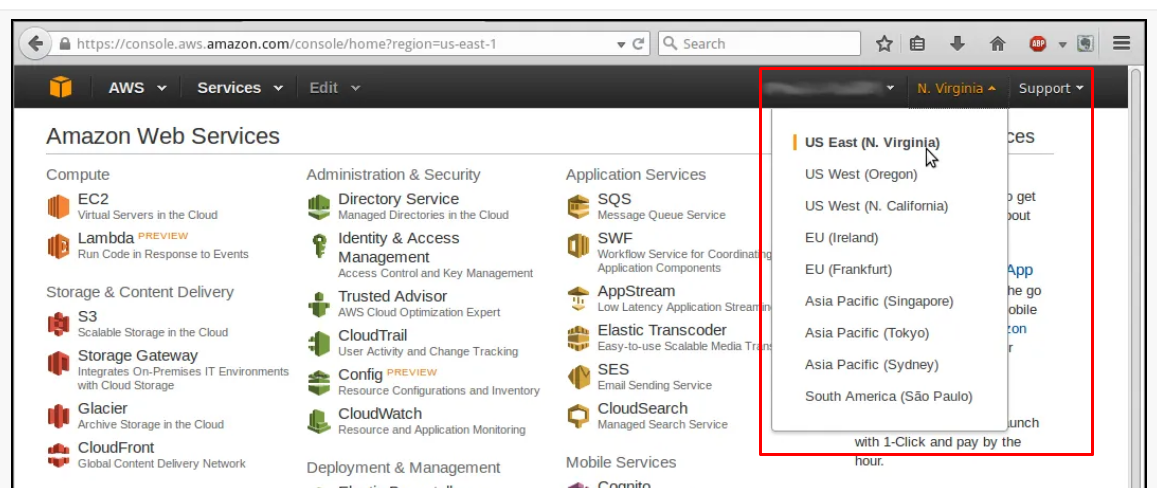
- Select Datacenter of your choice (Top right before Support)
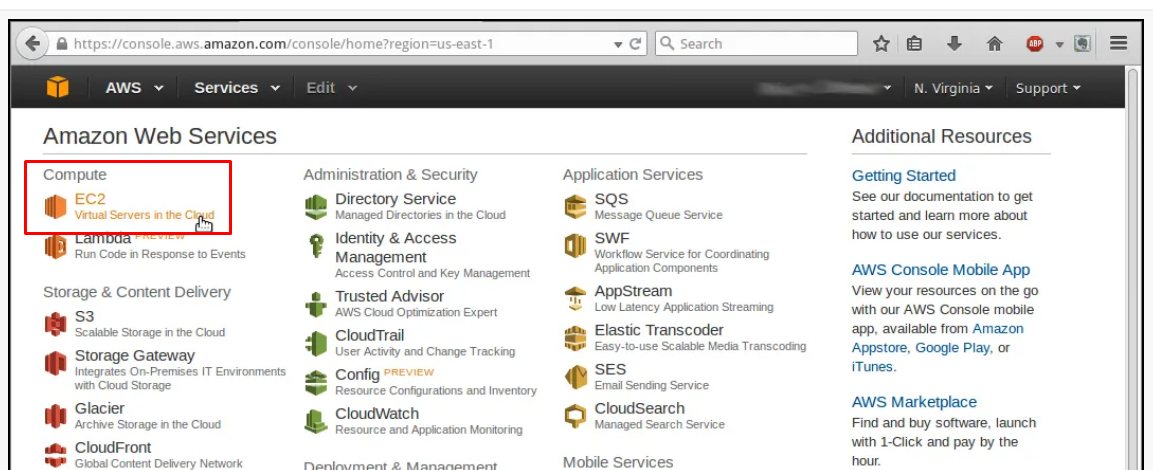
- Use the Elastic Compute (EC2) service
- Choose base image
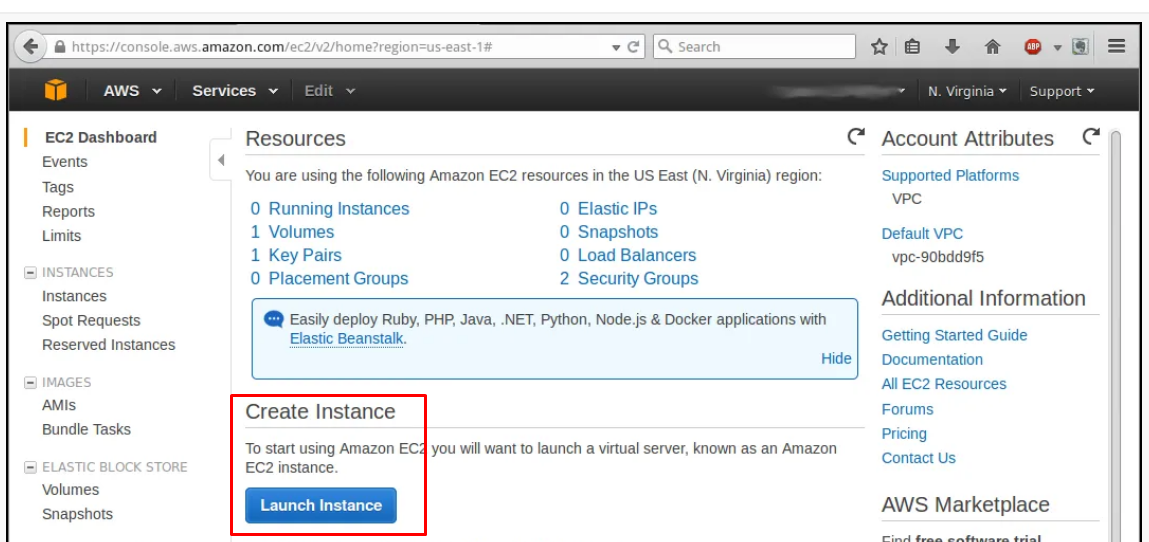
- Click on big “Launch instance” button.
- Click on the “Free-tier only”
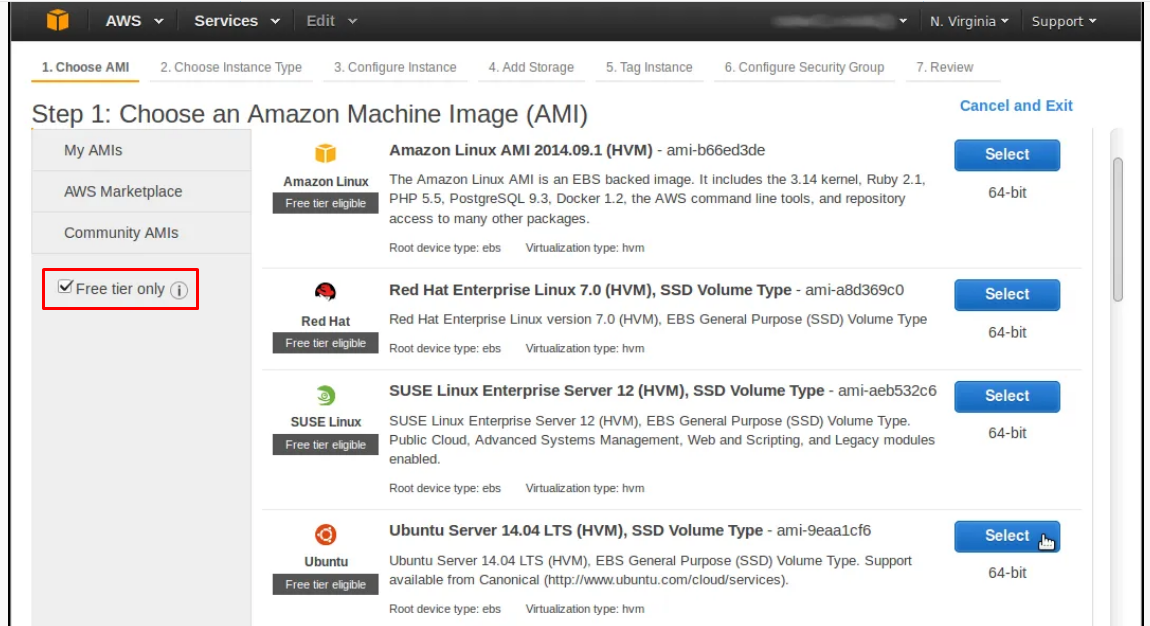
- Select instance type
- Choose the default instance type, t2.micro
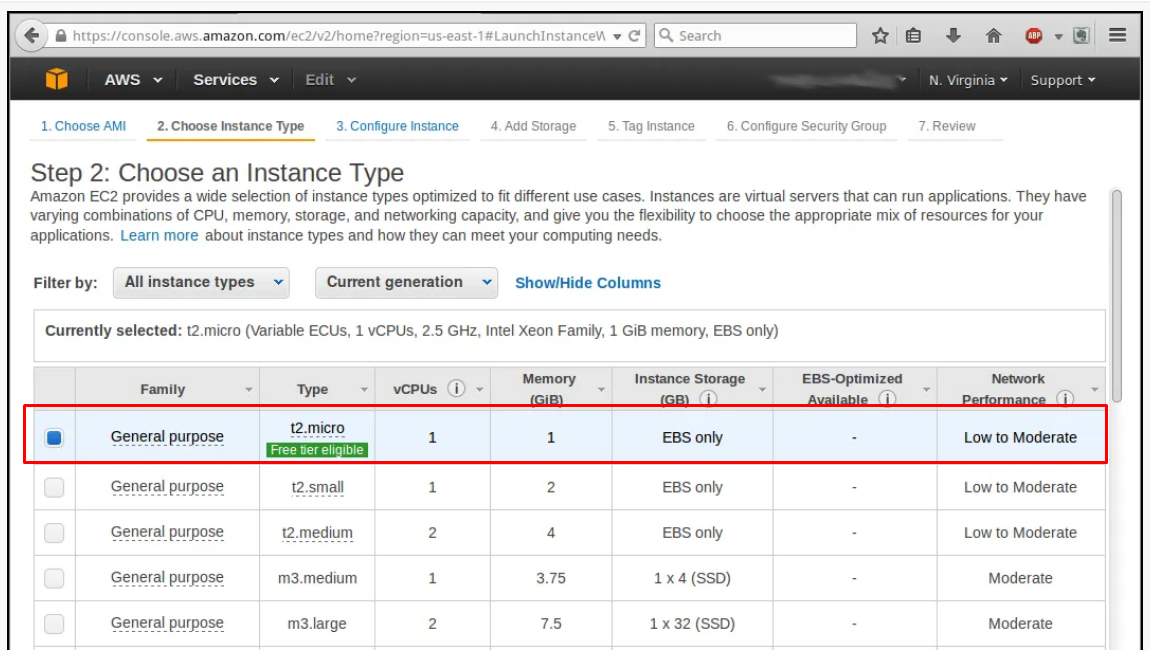
- Use all the default settings. Click on the “Review and Launch” button.
- Choose the default instance type, t2.micro
- Click on big “Launch instance” button.
- Launch the instance
- For now, ignore the security warning.
- Click on the “Launch” button.
- Download private key
- Choose the “Create a new key pair” option from the menu options
- Then give the key pair a name
- Click on “Download Key Pair”.
- Save the file to your PC.
- Finally, click on the “Launch Instances” button.
- Secure key pair file permissions
- Change the user permissions to “Read Only”.

